Main Viewport
Basic structure
As our component will grow in this tutorial with new UI elements, we already prepare the rough DOM structure for the controls. We also want our component to fit 80% of the width and height of the page and scroll within this area, so let's change our file to the following:
<!DOCTYPE html>
<html lang="en">
  <head>
    <meta charset="utf-8" />
    <title>AlphaTab Tutorial</title>
    <script src="https://cdn.jsdelivr.net/npm/@coderline/alphatab@latest/dist/alphaTab.js"></script>
    <style type="text/css">
      .at-wrap {
        width: 80vw;
        height: 80vh;
        margin: 0 auto;
        border: 1px solid rgba(0, 0, 0, 0.12);
        display: flex;
        flex-direction: column;
        overflow: hidden;
        position: relative;
      }
      .at-content {
        position: relative;
        overflow: hidden;
        flex: 1 1 auto;
      }
      .at-sidebar {
        position: absolute;
        top: 0;
        left: 0;
        bottom: 0;
        max-width: 70px;
        width: auto;
        display: flex;
        align-content: stretch;
        z-index: 1001;
        overflow: hidden;
        border-right: 1px solid rgba(0, 0, 0, 0.12);
        background: #f7f7f7;
      }
      .at-viewport {
        overflow-y: auto;
        position: absolute;
        top: 0;
        left: 70px;
        right: 0;
        bottom: 0;
        padding-right: 20px;
      }
      .at-footer {
        flex: 0 0 auto;
        background: #436d9d;
        color: #fff;
      }
    </style>
  </head>
  <body>
    <div class="at-wrap">
      <div class="at-content">
        <div class="at-sidebar">
          Track selector will go here
        </div>
        <div class="at-viewport">
            <!-- Viewport will scroll, at-main will contain music sheet -->
            <div class="at-main"></div>
        </div>
      </div>
      <div class="at-controls">
        Player controls will go here
      </div>
    </div>
    <script type="text/javascript"></script>
  </body>
</html>
You can already see a bit the structure of the controls. This step is not really specific to alphaTab but important to understand from a structural perspective. We are building a layout with a sidebar, main viewport and a footer. This structure is put together with a combination of flexbox and absolute positioning. CSS grid might be more suitable here but for better browser support we stick to these technologies.
The absolute positioning in the content will allow us to later build a sidebar that expands dynamically as an overlay on the music sheet. On the main viewport we also added a bit of padding to reserve some space for the browser scrollbar.
For your project your development and design skills will be be needed to structure the elements right. You need to think where you want to have the scrolling (full page or within an element) which controls should go where (overlays, sidebars, ...) and build your planned structure based on this.
From now on, the tutorial might only list small code snippets depending on the changes added. The complete file with all changes applied will be added at the bottom of each tutorial section.
Initialize alphaTab
Now let's finally bring alphaTab into the game. But before we can initialize alphaTab we need to get some input
data ready. In most cases you will have some website backend that will know which input file to load for display.
The input can be of any supported format like Guitar Pro files or alphaTex.
In this tutorial we will use a demo file hosted by alphaTab at https://www.alphatab.net/files/canon.gp.
In the script tag below the wrapper element we fill in the following code.
<script type="text/javascript">
    // load elements
    const wrapper = document.querySelector(".at-wrap");
    const main = wrapper.querySelector(".at-main");

    // initialize alphatab
    const settings = {
      file: "https://www.alphatab.net/files/canon.gp",
    };
    const api = new alphaTab.AlphaTabApi(main, settings);
</script>
There is not much special about this snippet:
- First we select the DOM element into which we want to initialize alphaTab.
- Then we create a settings object specifying the file we want to display.
- Then we create a new alphaTab API object.
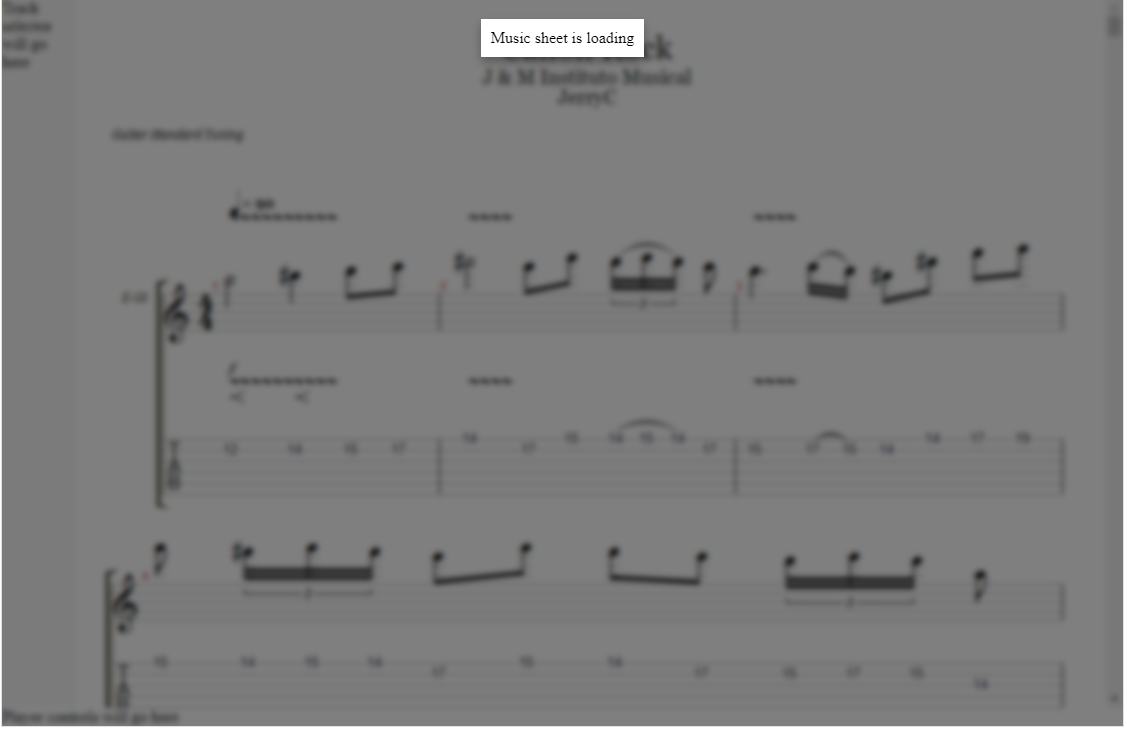
The last part will directly trigger the loading of the file and will display the music sheet in the viewport:

Loading indicator
Depending on the size of the music sheet, it might take a while until the file is downloaded and rendered. We want to show a loading indicator until this is done. This way, the user will visually see that the file is being loaded and rendered.
To do this, we will first extend the DOM with an overlay that we will dynamically show and hide depending on some alphaTab events.
- New DOM
- New CSS
<div class="at-wrap">
  <div class="at-overlay">
    <div class="at-overlay-content">
      Music sheet is loading
    </div>
  </div>
  <div class="at-content">
    <div class="at-sidebar">
      Track selector will go here
    </div>
    <div class="at-viewport">
      <div class="at-main"></div>
    </div>
  </div>
  <div class="at-controls">
    Player controls will go here
  </div>
</div>
.at-overlay {
  /** Fill Parent */
  position: absolute;
  top: 0;
  left: 0;
  right: 0;
  bottom: 0;
  z-index: 1002;

  /* Blurry dark shade */
  backdrop-filter: blur(3px);
  background: rgba(0, 0, 0, 0.5);

  /** center content */
  display: flex;
  justify-content: center;
  align-items: flex-start;
}

.at-overlay-content {
  /* white box with drop-shadow */
  margin-top: 20px;
  background: #fff;
  box-shadow: 0px 5px 10px 0px rgba(0, 0, 0, 0.3);
  padding: 10px;
}
Currently, the overlay is always visible. So let's listen to two of the main rendering events of alphaTab,
renderStarted and renderFinished,
to show the overlay when rendering starts, and hide it as soon the rendering finishes:
// overlay logic
const overlay = wrapper.querySelector(".at-overlay");
api.renderStarted.on(() => {
  overlay.style.display = 'flex';
});
api.renderFinished.on(() => {
  overlay.style.display = 'none';
});
Now we have our alphaTab controls, displaying an input file and showing an indicator to the end-user while it is loading. alphaTab takes care of all needed bits to load the file via Ajax, render the music sheet and listen on certain events, such as resizes to scale the music sheet.
There is a huge list of settings that allow you to adjust the display of alphaTab, such as adjusting which elements are shown, how the music sheet is laid out, which tracks to display and other internals. It can be found in the reference docs.
Final File
<!DOCTYPE html>
<html lang="en">
  <head>
    <meta charset="utf-8" />
    <title>AlphaTab Tutorial</title>
    <script src="https://cdn.jsdelivr.net/npm/@coderline/alphatab@latest/dist/alphaTab.js"></script>
    <style type="text/css">
      .at-wrap {
        width: 80vw;
        height: 80vh;
        margin: 0 auto;
        border: 1px solid rgba(0, 0, 0, 0.12);
        display: flex;
        flex-direction: column;
        overflow: hidden;
        position: relative;
      }
      .at-content {
        position: relative;
        overflow: hidden;
        flex: 1 1 auto;
      }
      .at-sidebar {
        position: absolute;
        top: 0;
        left: 0;
        bottom: 0;
        max-width: 70px;
        width: auto;
        display: flex;
        align-content: stretch;
        z-index: 1001;
        overflow: hidden;
        border-right: 1px solid rgba(0, 0, 0, 0.12);
        background: #f7f7f7;
      }
      .at-viewport {
        overflow-y: auto;
        position: absolute;
        top: 0;
        left: 70px;
        right: 0;
        bottom: 0;
        padding-right: 20px;
      }
      .at-footer {
        flex: 0 0 auto;
        background: #436d9d;
        color: #fff;
      }

      .at-overlay {
        /** Fill Parent */
        position: absolute;
        top: 0;
        left: 0;
        right: 0;
        bottom: 0;
        z-index: 1002;

        /* Blurry dark shade */
        backdrop-filter: blur(3px);
        background: rgba(0, 0, 0, 0.5);

        /** center content */
        display: flex;
        justify-content: center;
        align-items: flex-start;
      }

      .at-overlay-content {
        /* white box with drop-shadow */
        margin-top: 20px;
        background: #fff;
        box-shadow: 0px 5px 10px 0px rgba(0, 0, 0, 0.3);
        padding: 10px;
      }
    </style>
  </head>
  <body>
    <div class="at-wrap">
      <div class="at-overlay">
        <div class="at-overlay-content">
          Music sheet is loading
        </div>
      </div>
      <div class="at-content">
        <div class="at-sidebar">
          Track selector will go here
        </div>
        <div class="at-viewport">
          <div class="at-main"></div>
        </div>
      </div>
      <div class="at-controls">
        Player controls will go here
      </div>
    </div>
    <script type="text/javascript">
      // load elements
      const wrapper = document.querySelector(".at-wrap");
      const main = wrapper.querySelector(".at-main");

      // initialize alphatab
      const settings = {
        file: "https://www.alphatab.net/files/canon.gp",
      };
      const api = new alphaTab.AlphaTabApi(main, settings);

      // overlay logic
      const overlay = wrapper.querySelector(".at-overlay");
      api.renderStarted.on(() => {
        overlay.style.display = "flex";
      });
      api.renderFinished.on(() => {
        overlay.style.display = "none";
      });
    </script>
  </body>
</html>